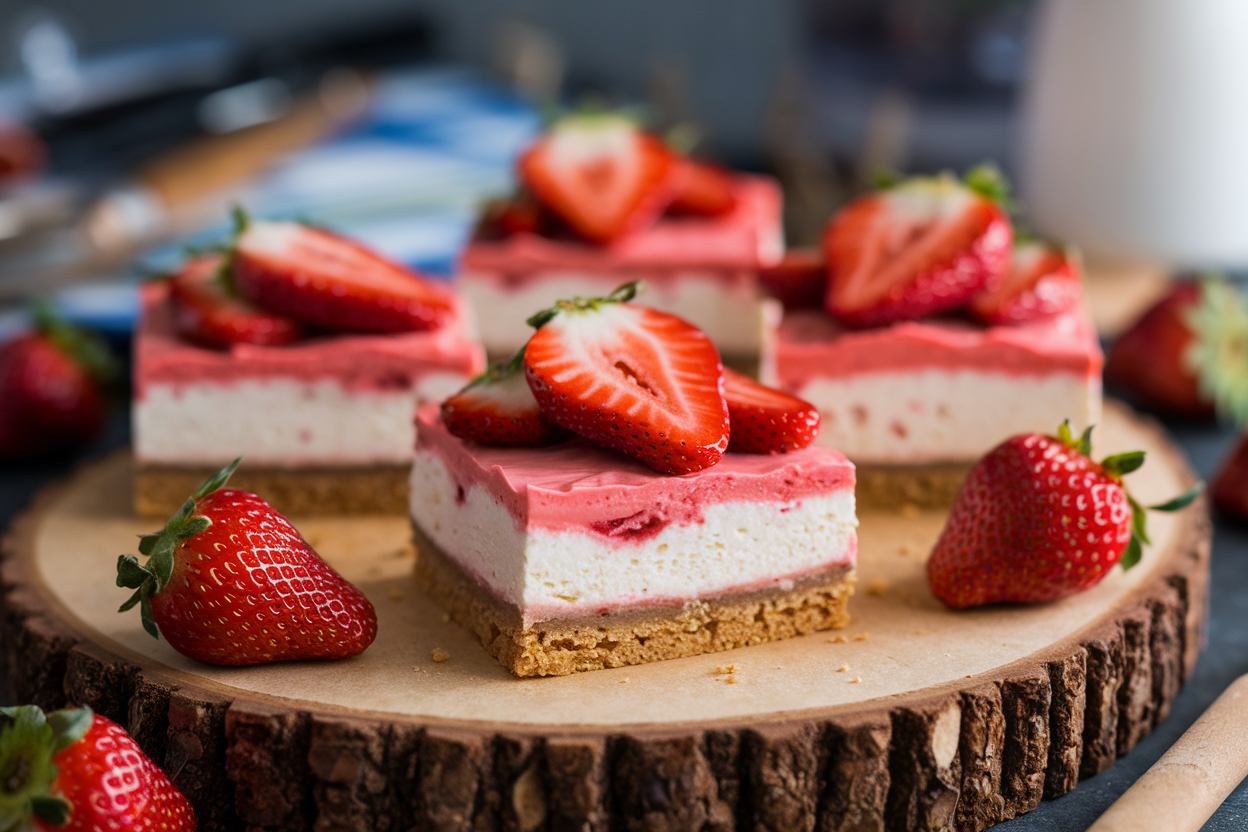
Homemade Strawberry Cheesecake Bars
You’ve been scrolling through dessert recipes for 20 minutes. You want something impressive but don’t want to spend your entire weekend in the kitchen. You’re tired of complicated baking projects that require a PhD in pastry arts.
What if you could make a dessert that gets more likes than your vacation photos?
A dessert that makes people think you secretly trained under a Michelin-starred chef? This isn’t a fantasy. It’s reality.
Strawberry cheesecake bars are your secret weapon.
They combine the elegance of a gourmet dessert with the simplicity of a no-bake project. Stop overcomplicating your life. Start here.
Why This Recipe Works
This recipe is a masterclass in efficiency.
🍫 The Ultimate No-Bake Dessert Ebook 🍓
30 mouthwatering no-bake recipes you can whip up in minutes — creamy cheesecakes, fruity parfaits, chocolatey bars, and more!
- ⚡Quick & easy — no oven required
- 📖30 recipes + bonus treat
- 🍓Chocolate, fruit, nutty & refreshing flavors
- ✨Beautifully designed, instant download
The crust requires zero baking, saving you time and keeping your kitchen cool. The filling uses simple, powerful ingredients that do all the heavy lifting for you.
You get the rich, creamy texture of a classic New York cheesecake without the stress of a water bath or cracked top. The strawberry swirl isn’t just for looks; it provides a tangy, fruity punch that cuts through the richness perfectly.
It’s the ultimate crowd-pleaser.
It looks professional but is built for beginners. Who doesn’t love a dessert that makes you look like a genius?
Ingredients You’ll Need
Gather these simple components. Quality matters, so don’t cheap out on the cream cheese.
- For the Crust: 2 cups graham cracker crumbs, 1/2 cup unsalted butter (melted), 1/4 cup granulated sugar.
- For the Cheesecake Filling: 24 oz (three 8-oz blocks) full-fat cream cheese (softened), 1 cup powdered sugar, 1 tsp vanilla extract, 1 cup heavy whipping cream.
- For the Strawberry Swirl: 1 cup fresh strawberries (hulled and chopped), 2 tbsp granulated sugar, 1 tbsp lemon juice.
Step-by-Step Instructions
Follow these steps in order.
Do not try to improvise halfway through. I trust you, but the recipe doesn’t.
- Prep the Pan: Line an 8×8 or 9×9 inch baking pan with parchment paper, leaving some overhang on two sides. This creates handles to lift the bars out later.
You’ll thank me.
- Make the Crust: In a medium bowl, mix the graham cracker crumbs, melted butter, and sugar until it resembles wet sand. Press this mixture firmly and evenly into the bottom of your prepared pan. Use a flat-bottomed cup to really pack it down.
- Create the Strawberry Swirl: In a small saucepan over medium heat, combine the strawberries, sugar, and lemon juice.
Cook for 5-7 minutes, mashing the berries with a spoon, until it thickens into a saucy consistency. Let it cool completely.
- Whip the Filling: In a large bowl, beat the softened cream cheese with an electric mixer until smooth and creamy. Add the powdered sugar and vanilla, beating until combined.
In a separate bowl, whip the heavy cream to stiff peaks. Gently fold the whipped cream into the cream cheese mixture until no white streaks remain.
- Assemble the Bars: Spread the cheesecake filling evenly over the prepared crust. Dollop the cooled strawberry sauce on top.
Use a knife or skewer to swirl it beautifully into the filling.
- Chill: Refrigerate the bars for at least 6 hours, but overnight is ideal. This is the hardest part—waiting.
How to Store Your Masterpiece
These bars must be stored in the refrigerator. Cover the pan tightly with plastic wrap or transfer cut bars to an airtight container.
They will stay perfectly fresh for up to 5 days.
If you want to keep them longer, they freeze amazingly well. Place individual bars on a parchment-lined baking sheet, freeze until solid, then transfer to a freezer bag.
They’ll keep for up to 3 months. Thaw in the fridge for a few hours before serving.
See? Easy.
The Benefits of This Recipe
This recipe is a strategic life upgrade. First, it’s a major time-saver compared to a traditional springform pan cheesecake.
No baking means no worrying about doneness or cracks.
Second, it’s incredibly portable. Bringing a whole cheesecake to a party is a logistical nightmare. Bringing cheesecake bars?
You’re a hero.
Finally, it’s customizable. The strawberry swirl can be swapped for any fruit you like. You’re not making a dessert; you’re building a versatile skill.
Common Mistakes to Avoid
Even legends make mistakes.
Avoid these pitfalls to ensure your bars are perfect.
- Using low-fat cream cheese: Just don’t. The filling won’t set properly and the texture will be grainy. Full-fat is non-negotiable.
- Adding warm strawberry sauce: If your strawberry mixture is still warm when you swirl it in, it will melt the filling and create a soupy mess.
Patience is a virtue.
- Not chilling long enough: Six hours is the minimum. If you try to cut them after two, you’ll have cheesecake soup. Respect the process.
Simple Alternatives & Swaps
Don’t have strawberries?
No problem. This recipe is your canvas.
Use other berries like raspberries or blueberries for the swirl. You can even use a high-quality store-bought fruit preserves for an ultra-quick shortcut.
For the crust, try crushed Oreos (without the filling) instead of graham crackers for a chocolatey twist.
You can also add a tablespoon of lemon zest to the filling for an extra zing. Get creative.
Frequently Asked Questions
Can I make this recipe gluten-free?
Absolutely. Simply ensure your graham crackers are a certified gluten-free brand, or swap them out for gluten-free cookie crumbs.
The rest of the recipe is naturally gluten-free.
My filling is too runny. What did I do wrong?
You probably didn’t whip the heavy cream to stiff peaks, or you tried to mix everything while the cream cheese was still cold. Always use room temperature cream cheese and whip that cream until it stands up on its own.
Can I use frozen strawberries?
Yes, frozen strawberries work perfectly for the swirl.
There’s no need to thaw them first; just add a minute or two to the cooking time. IMO, it’s a great way to make this dessert year-round.
Why did my strawberry swirl sink?
Your cheesecake layer might have been too soft when you added the swirl. Make sure your filling is thick and well-whipped.
Also, don’t over-swirl. A few figure-eight motions are all you need.
Final Thoughts
This isn’t just another dessert recipe. It’s a tool.
A tool to impress your friends, satisfy your family, and give yourself a well-deserved treat without the hassle.
The payoff is enormous compared to the minimal effort required. You have the blueprint. You know the pitfalls.
Now go make something incredible. FYI, your future self is already proud of you.

