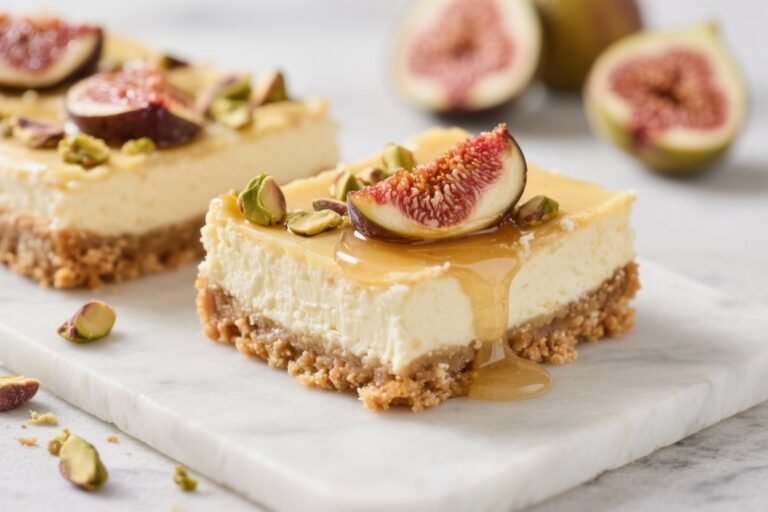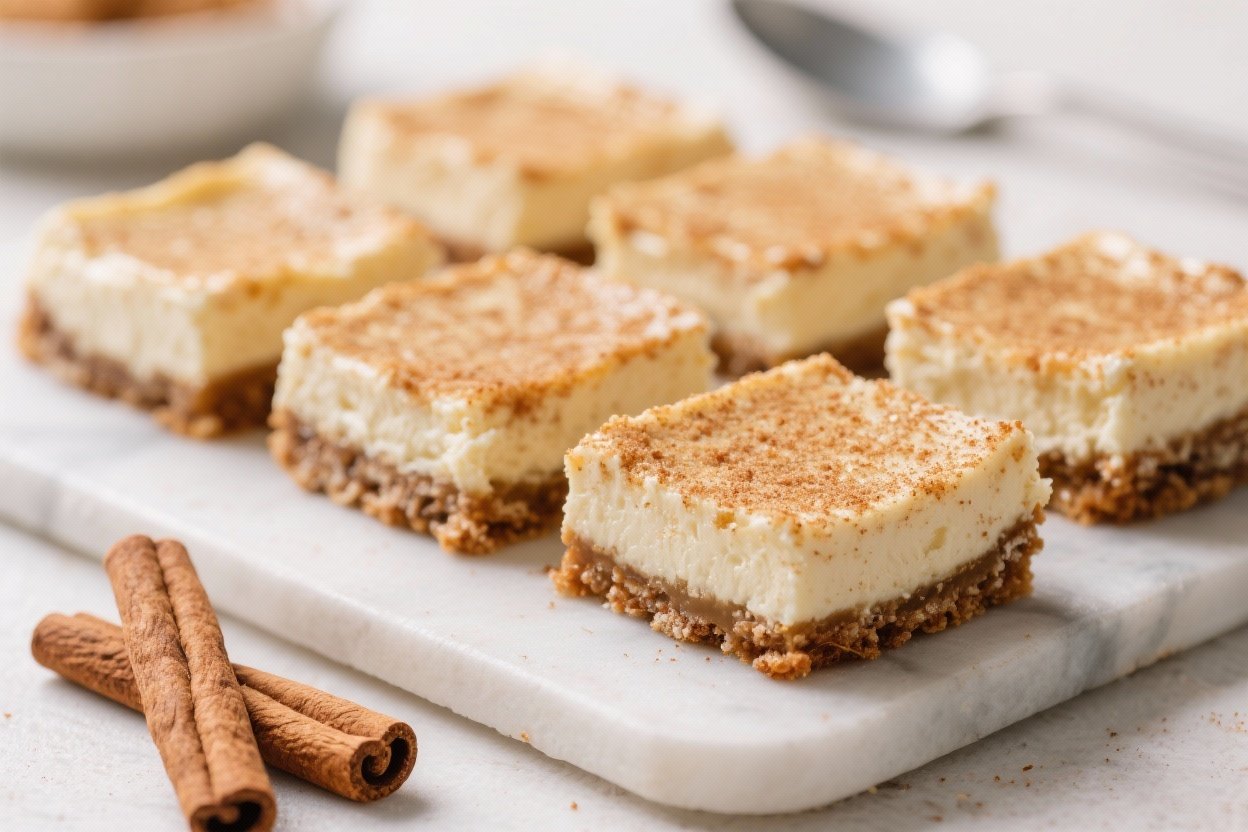
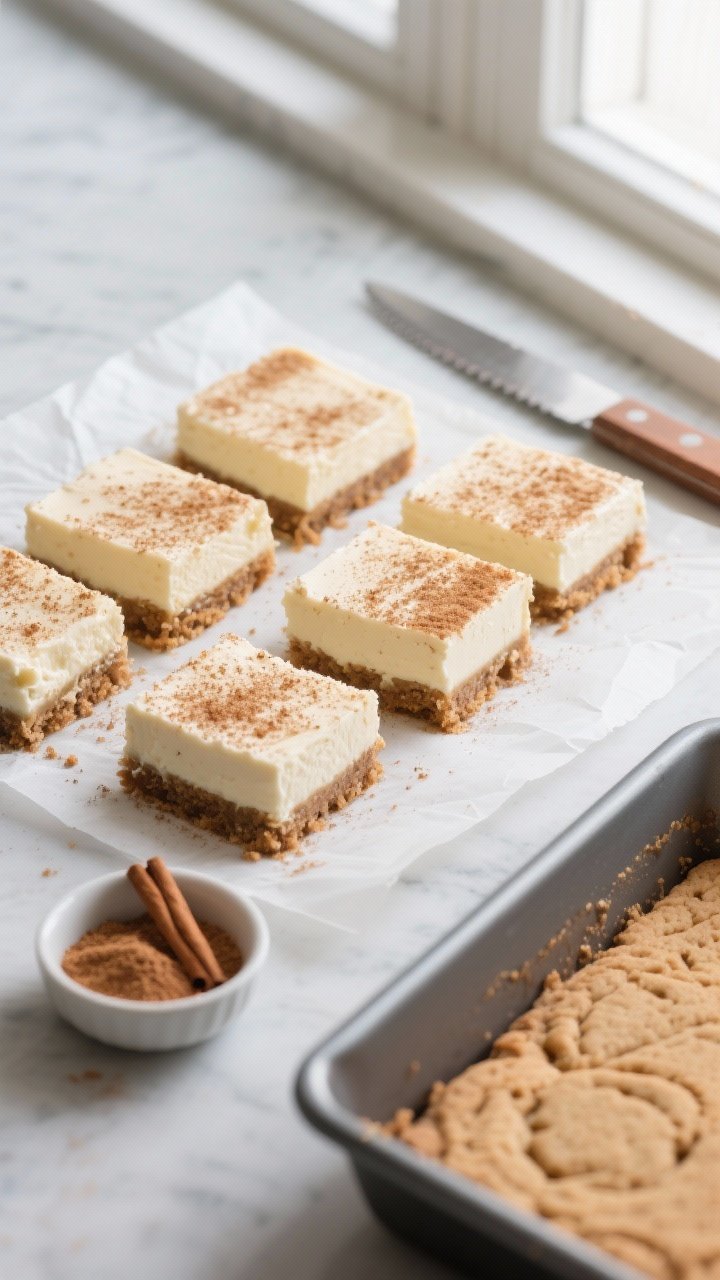
Snickerdoodle Cheesecake Bars (Easy Squares) – Cinnamon-Sugar Comfort Meets Creamy Cheesecake
If you love cinnamon-sugar cookies and creamy cheesecake, these Snickerdoodle Cheesecake Bars are the best of both worlds. They’re soft, tangy, and studded with a crackly cinnamon top—like a cozy hug in dessert form. You don’t need fancy tools or bakery skills, just a mixing bowl and a pan.
These bars slice clean, travel well, and wow a crowd. Bake them for potlucks, holidays, or a weeknight sweet treat.

Snickerdoodle Cheesecake Bars (Easy Squares) - Cinnamon-Sugar Comfort Meets Creamy Cheesecake
Ingredients
- For the cookie base: 1/2 cup unsalted butter, softened
- 3/4 cup granulated sugar
- 1 large egg
- 1 teaspoon vanilla extract
- 1 1/4 cups all-purpose flour
- 1/2 teaspoon cream of tartar
- 1/2 teaspoon baking soda
- 1/4 teaspoon fine salt
- For the cheesecake layer: 16 ounces cream cheese, softened
- 1/2 cup granulated sugar
- 2 large eggs
- 1 teaspoon vanilla extract
- 2 tablespoons sour cream (optional for extra creaminess)
- For the cinnamon-sugar topping: 2 tablespoons granulated sugar
- 1 1/2 teaspoons ground cinnamon
- Pan and tools: 8x8-inch baking pan (or 9x9 for thinner bars)
- Parchment paper
Instructions
- Preheat the oven to 350°F (175°C). Line your pan with parchment, leaving overhang for easy lifting.
- Make the cookie base: Beat butter and sugar until light and fluffy, about 2 minutes.Mix in the egg and vanilla.
- Whisk flour, cream of tartar, baking soda, and salt. Add to the butter mixture and mix just until combined.
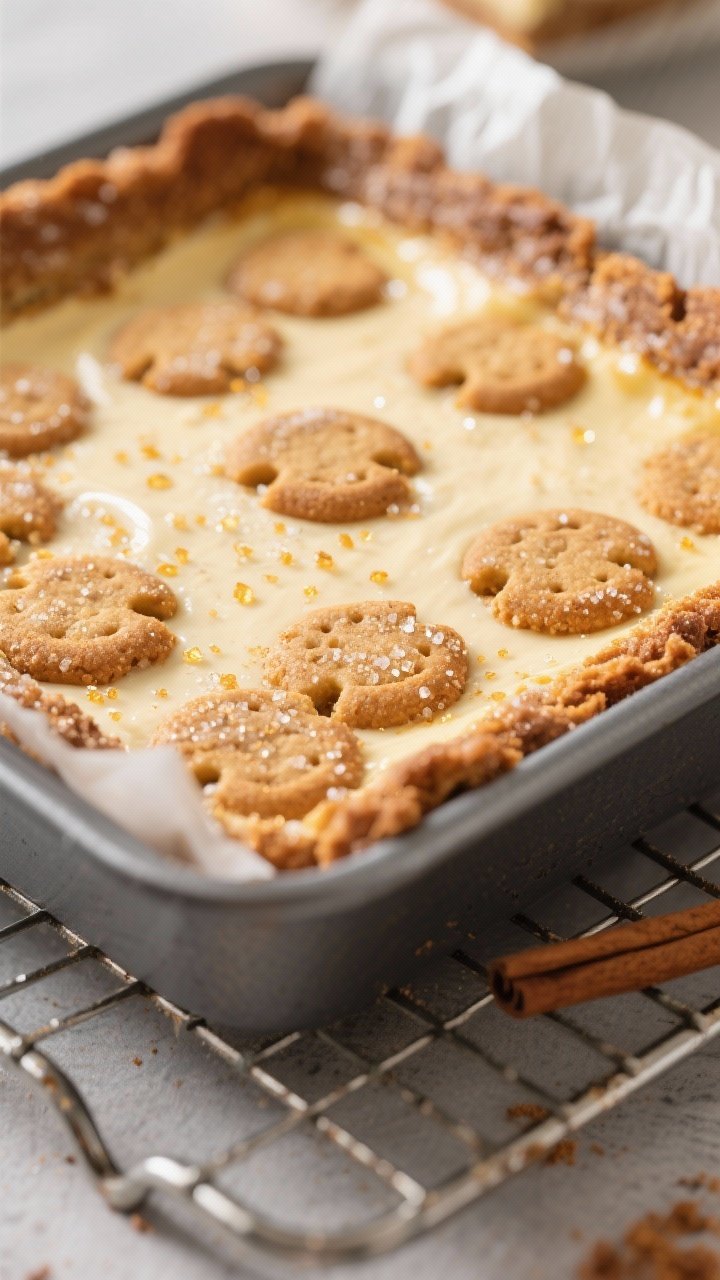
- Press about two-thirds of the dough evenly into the pan. Reserve the rest for topping.
- Make the cheesecake: Beat cream cheese until smooth.Add sugar and mix until creamy. Beat in eggs one at a time, then vanilla and sour cream.
- Pour the cheesecake batter over the cookie base and spread evenly.
- Pinch off small pieces of the remaining cookie dough and scatter over the top. It won’t fully cover—gaps are good.
- Stir together cinnamon and sugar.Sprinkle evenly over the top, covering both cheesecake and dough pieces.
- Bake 28–34 minutes (8x8 pan), until the edges are set and the center has a slight wobble. Don’t overbake.
- Cool completely on a rack, then chill at least 3 hours (overnight is best). Slice into squares with a sharp knife, wiping between cuts.
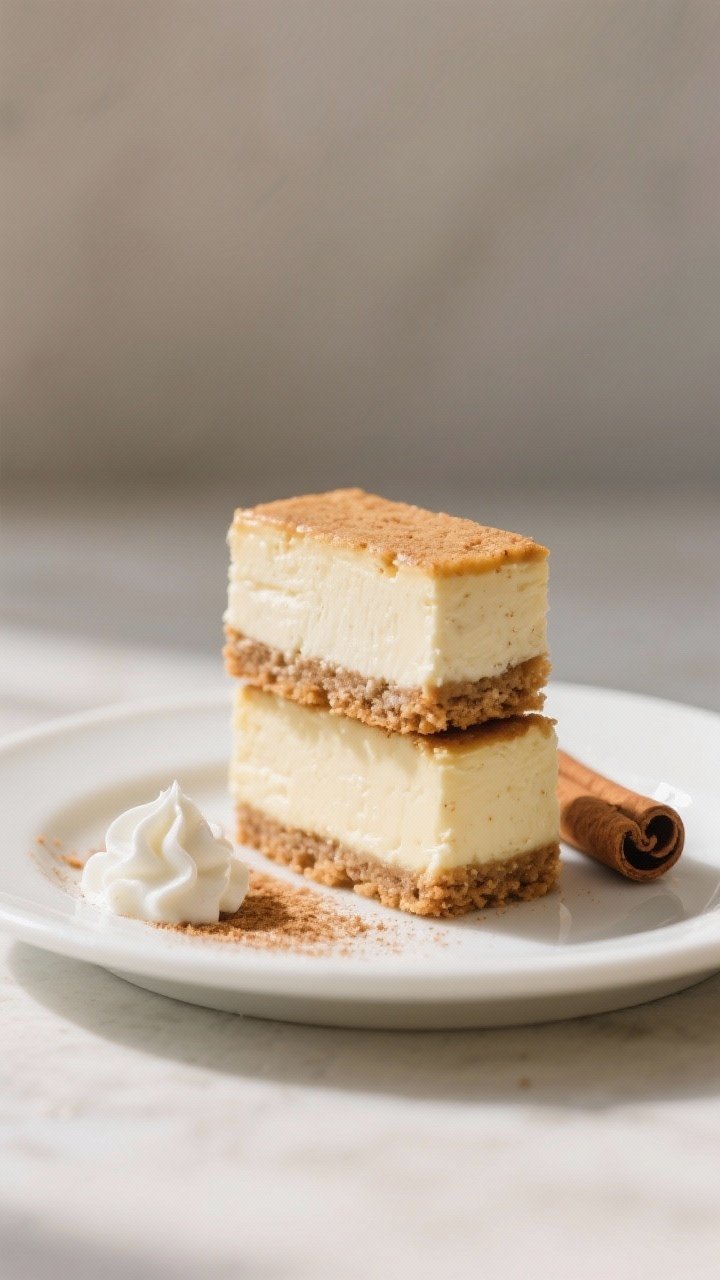
What Makes This Special
- Two textures in one bite: A soft snickerdoodle cookie base with a silky cheesecake layer.
- Foolproof method: Simple steps and forgiving batter—great for beginners.
- Big cinnamon payoff: A cinnamon-sugar sprinkle on top gives that classic snickerdoodle crackle.
- Make-ahead friendly: Tastes even better after chilling overnight.
Shopping List
- For the cookie base:
- 1/2 cup unsalted butter, softened
- 3/4 cup granulated sugar
- 1 large egg
- 1 teaspoon vanilla extract
- 1 1/4 cups all-purpose flour
- 1/2 teaspoon cream of tartar
- 1/2 teaspoon baking soda
- 1/4 teaspoon fine salt
- For the cheesecake layer:
- 16 ounces cream cheese, softened
- 1/2 cup granulated sugar
- 2 large eggs
- 1 teaspoon vanilla extract
- 2 tablespoons sour cream (optional for extra creaminess)
- For the cinnamon-sugar topping:
- 2 tablespoons granulated sugar
- 1 1/2 teaspoons ground cinnamon
- Pan and tools:
- 8×8-inch baking pan (or 9×9 for thinner bars)
- Parchment paper
Instructions
- Preheat the oven to 350°F (175°C). Line your pan with parchment, leaving overhang for easy lifting.
- Make the cookie base: Beat butter and sugar until light and fluffy, about 2 minutes.
Mix in the egg and vanilla.
- Whisk flour, cream of tartar, baking soda, and salt. Add to the butter mixture and mix just until combined.
- Press about two-thirds of the dough evenly into the pan. Reserve the rest for topping.
- Make the cheesecake: Beat cream cheese until smooth.
Add sugar and mix until creamy. Beat in eggs one at a time, then vanilla and sour cream.
- Pour the cheesecake batter over the cookie base and spread evenly.
- Pinch off small pieces of the remaining cookie dough and scatter over the top. It won’t fully cover—gaps are good.
- Stir together cinnamon and sugar.
Sprinkle evenly over the top, covering both cheesecake and dough pieces.
- Bake 28–34 minutes (8×8 pan), until the edges are set and the center has a slight wobble. Don’t overbake.
- Cool completely on a rack, then chill at least 3 hours (overnight is best). Slice into squares with a sharp knife, wiping between cuts.
Keeping It Fresh
- Store covered in the fridge for up to 5 days.
The flavor deepens after day one.
- For longer storage, freeze tightly wrapped bars for up to 2 months. Thaw in the fridge overnight.
- Serve chilled for clean slices, or let sit at room temp for 10–15 minutes for a softer bite.
Health Benefits
- Protein and calcium: Cream cheese offers small amounts of both.
- Portion control: Bars make it easy to enjoy a smaller square without overdoing it.
- Customizable sugar and fat: You can reduce sugar slightly or use light cream cheese to suit your goals.
Common Mistakes to Avoid
- Skipping the chill time: Cutting too soon leads to messy slices and a loose center.
- Overmixing the cheesecake: Introduces excess air and can cause cracks. Mix just until smooth.
- Overbaking: A firm, dry center means the bars will taste dense.
Pull them with a slight wobble.
- Forgetting parchment: Makes it hard to lift and slice cleanly.
- Using cold ingredients: Cold cream cheese clumps and won’t turn silky. Soften it first.
Recipe Variations
- Apple pie swirl: Fold 1/2 cup finely diced, cinnamon-cooked apples into the cheesecake layer.
- Churro crunch: Add 1/2 cup cinnamon cereal pieces on top for extra texture.
- Maple twist: Replace 1/4 cup of the sugar in the cheesecake with pure maple syrup and reduce sour cream to 1 tablespoon.
- Gluten-free: Use a 1:1 gluten-free all-purpose flour with xanthan gum.
- Lightened up: Use neufchâtel (1/3 less fat) and reduce sugar by 2–3 tablespoons overall.
Can I use a 9×13-inch pan?
Yes, but the bars will be thinner. Double the recipe for a full, bakery-style thickness in a 9×13.
Start checking for doneness around 28–30 minutes.
Do I have to use cream of tartar?
It gives snickerdoodles their signature tang and texture. If you don’t have it, replace the baking soda and cream of tartar with 1 teaspoon baking powder. The flavor will be slightly different but still delicious.
How do I know when it’s done?
The edges should look set and slightly puffed, while the center jiggles gently when you nudge the pan.
If it’s sloshing, bake a few minutes longer.
Can I make these ahead?
Absolutely. These bars are better after a chill. Bake the day before, refrigerate overnight, and slice before serving.
What if I don’t have sour cream?
You can skip it or use plain Greek yogurt.
It adds a touch of tang and silkiness, but the recipe works without it.
Final Thoughts
Snickerdoodle Cheesecake Bars are the kind of treat that feels special without asking much of you in the kitchen. The warm cinnamon, buttery cookie base, and creamy center make every bite comforting. Keep this recipe in your back pocket for holidays, bake sales, and anytime you need a low-effort, high-reward dessert.
One pan, simple steps, big smiles.