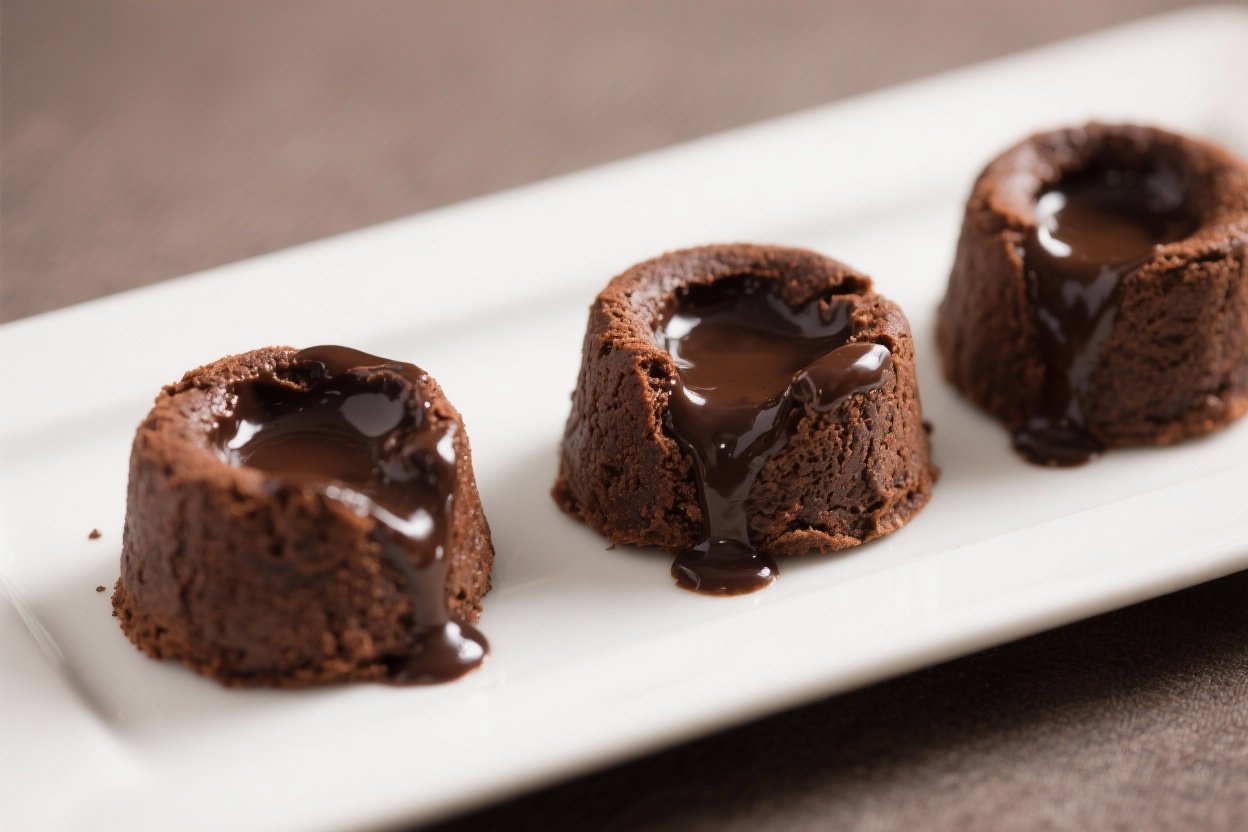
Molten Chocolate Lava Cakes (Restaurant Style) – Rich, Gooey, and Easy
These little cakes look fancy, taste luxurious, and take less time than most desserts. The outside is tender and cakey, while the center stays warm and molten, like a spoonable truffle. They’re perfect for date night, dinner parties, or when you want something special without hours in the kitchen.
You’ll only need basic tools and pantry staples. Follow the timing closely, and you’ll get that signature lava flow every time.

Molten Chocolate Lava Cakes (Restaurant Style) - Rich, Gooey, and Easy
Ingredients
- Dark chocolate: 6 ounces (170 g), roughly chopped, 60–70% cacao
- Unsalted butter: 1/2 cup (113 g), plus extra for greasing
- Granulated sugar: 1/2 cup (100 g)
- Eggs: 2 large
- Egg yolks: 2 large
- Vanilla extract: 1 teaspoon
- All-purpose flour: 1/4 cup (30 g)
- Fine salt: 1/8 teaspoon
- Cocoa powder: for dusting the ramekins
- Optional for serving: powdered sugar, vanilla ice cream, whipped cream, berries, or a pinch of flaky salt
Instructions
- Prep the ramekins: Heat the oven to 425°F (220°C). Generously butter four 6-ounce ramekins, then dust with cocoa powder.Tap out the excess. This prevents sticking and gives clean releases.
- Melt chocolate and butter: In a heatproof bowl set over a pot of barely simmering water, melt the chocolate and butter, stirring until smooth. Remove from heat and let it cool for 2–3 minutes.
- Whisk eggs and sugar: In a separate bowl, whisk the sugar, eggs, and egg yolks until slightly thickened and lighter in color, about 1 minute by hand.Whisk in the vanilla and salt.
- Combine: Pour the warm chocolate mixture into the egg mixture, whisking until smooth. Sift in the flour and gently fold until just combined. Don’t overmix.
- Fill: Divide the batter evenly among the prepared ramekins.Place them on a baking sheet for easy handling.
- Bake: Bake for 10–12 minutes. The edges should look set and dry, but the centers should still be slightly soft and jiggly. Do not overbake or you’ll lose the lava.
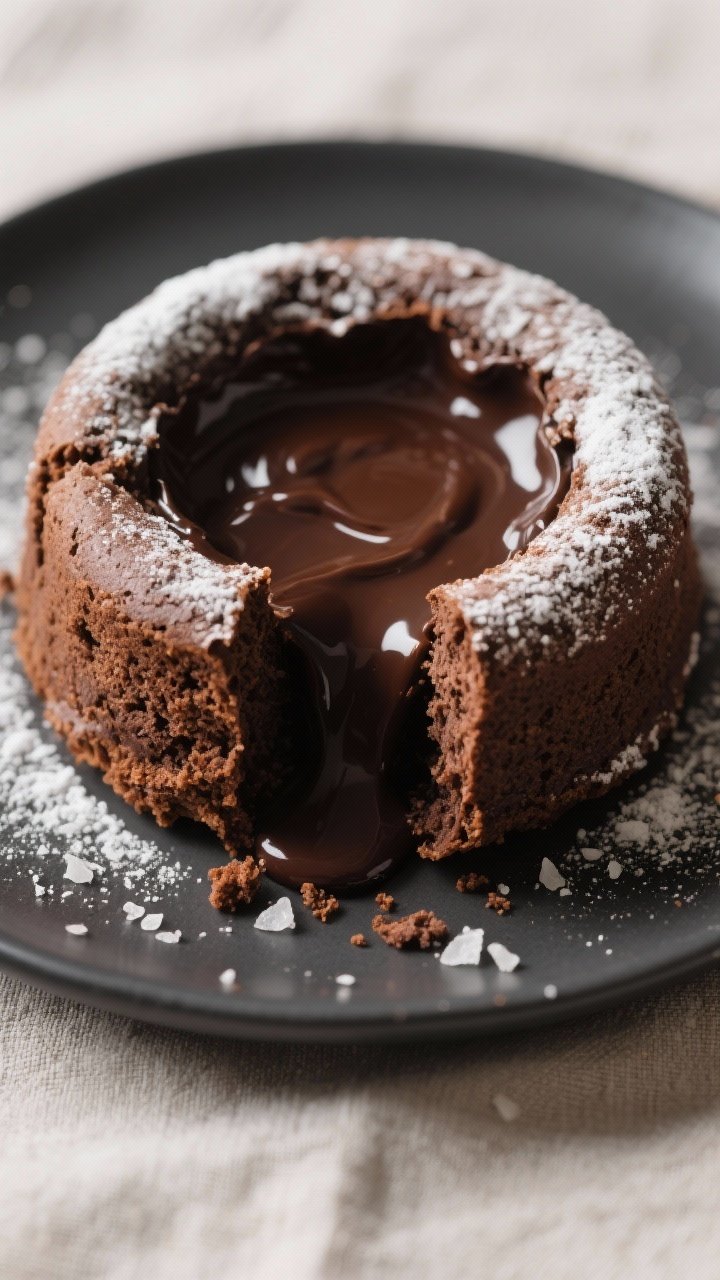
- Rest and unmold: Let the cakes rest for 1 minute. Run a thin knife around the edges, then invert each onto a plate.Lift the ramekin carefully.
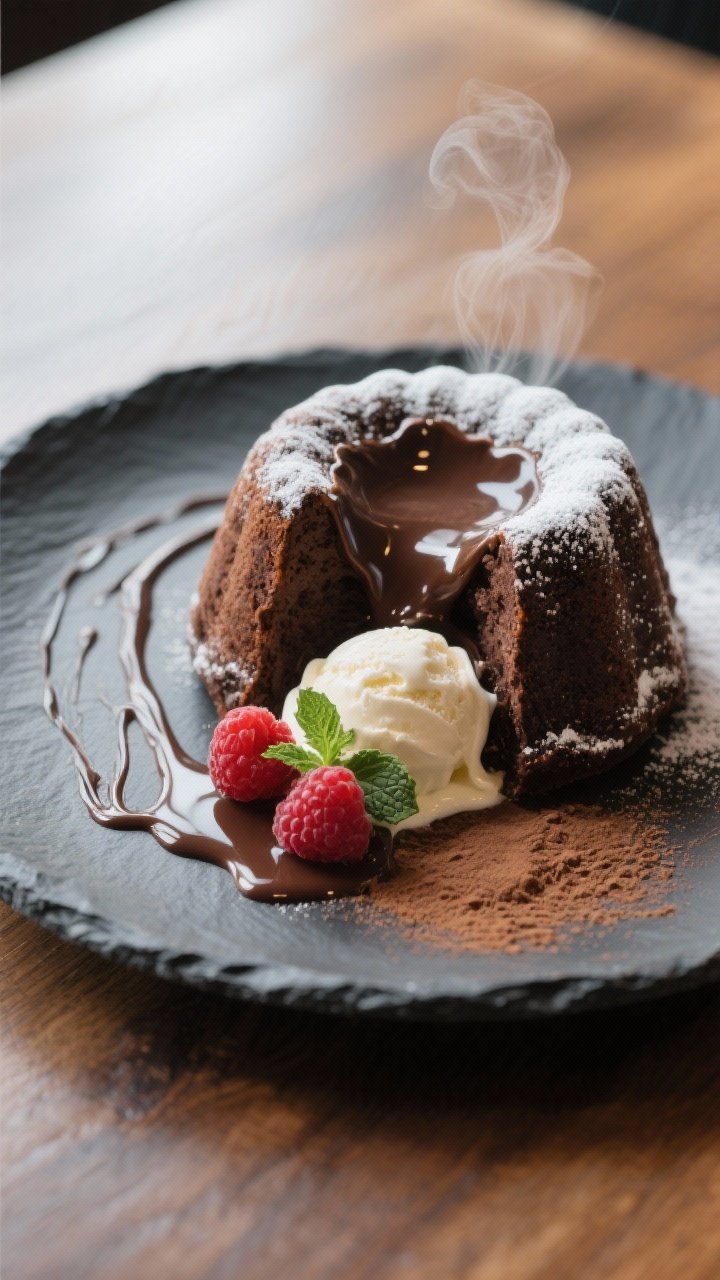
- Serve immediately: Dust with powdered sugar and add a scoop of ice cream or whipped cream. A few berries or a sprinkle of flaky salt make it restaurant-worthy.
What Makes This Special
These molten cakes give you a restaurant-style dessert in under 30 minutes, start to finish. The method is straightforward, and the batter can be made ahead.
You can bake them to order and serve them hot and dramatic. Plus, the recipe uses whole eggs and yolks for richness and structure, so the center melts while the edges set just right.
What You’ll Need
- Dark chocolate: 6 ounces (170 g), roughly chopped, 60–70% cacao
- Unsalted butter: 1/2 cup (113 g), plus extra for greasing
- Granulated sugar: 1/2 cup (100 g)
- Eggs: 2 large
- Egg yolks: 2 large
- Vanilla extract: 1 teaspoon
- All-purpose flour: 1/4 cup (30 g)
- Fine salt: 1/8 teaspoon
- Cocoa powder: for dusting the ramekins
- Optional for serving: powdered sugar, vanilla ice cream, whipped cream, berries, or a pinch of flaky salt
How to Make It
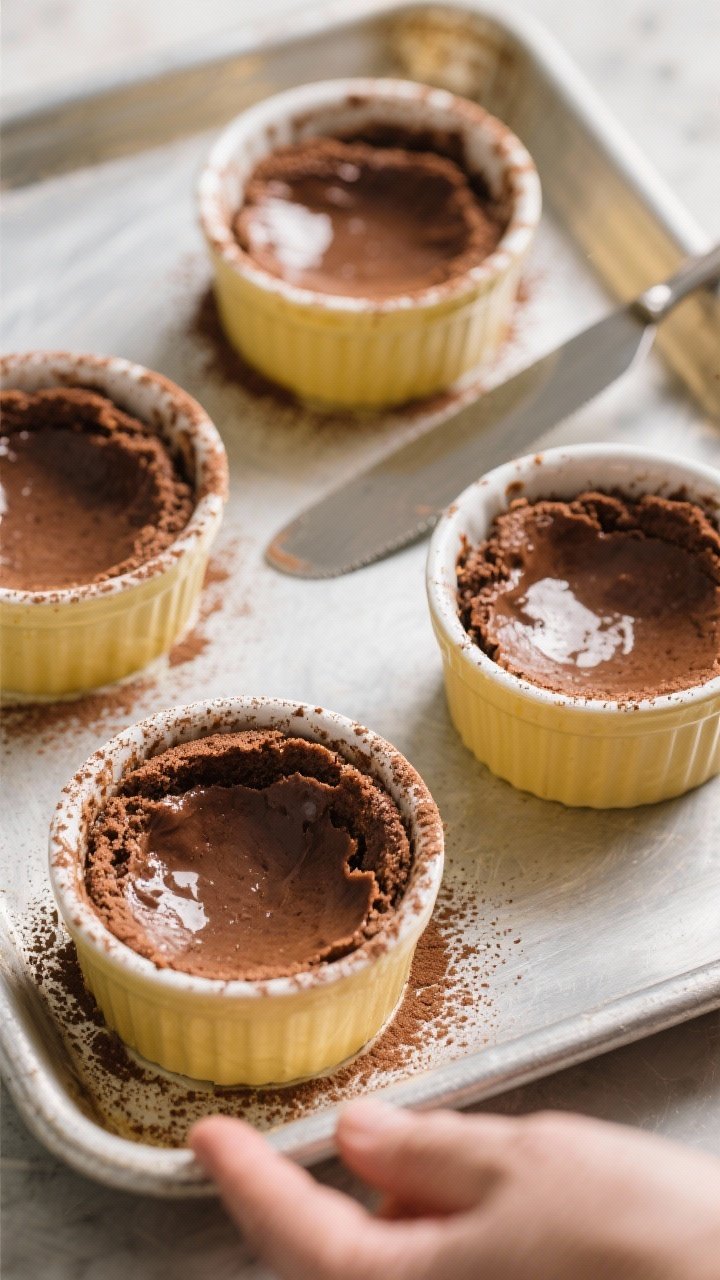
- Prep the ramekins: Heat the oven to 425°F (220°C). Generously butter four 6-ounce ramekins, then dust with cocoa powder.
Tap out the excess. This prevents sticking and gives clean releases.
- Melt chocolate and butter: In a heatproof bowl set over a pot of barely simmering water, melt the chocolate and butter, stirring until smooth. Remove from heat and let it cool for 2–3 minutes.
- Whisk eggs and sugar: In a separate bowl, whisk the sugar, eggs, and egg yolks until slightly thickened and lighter in color, about 1 minute by hand.
Whisk in the vanilla and salt.
- Combine: Pour the warm chocolate mixture into the egg mixture, whisking until smooth. Sift in the flour and gently fold until just combined. Don’t overmix.
- Fill: Divide the batter evenly among the prepared ramekins.
Place them on a baking sheet for easy handling.
- Bake: Bake for 10–12 minutes. The edges should look set and dry, but the centers should still be slightly soft and jiggly. Do not overbake or you’ll lose the lava.
- Rest and unmold: Let the cakes rest for 1 minute. Run a thin knife around the edges, then invert each onto a plate.
Lift the ramekin carefully.
- Serve immediately: Dust with powdered sugar and add a scoop of ice cream or whipped cream. A few berries or a sprinkle of flaky salt make it restaurant-worthy.
How to Store
These are best served fresh. If needed, refrigerate unbaked, filled ramekins for up to 24 hours.
Bring to room temperature for 30 minutes and bake as directed, adding 1–2 minutes if still cold. Leftover baked cakes won’t stay molten, but you can warm them briefly in the microwave for a soft, fudgy center.
Benefits of This Recipe
- Fast and impressive: From mixing to serving in about 25 minutes.
- Minimal equipment: Just bowls, whisk, and ramekins.
- Flexible timing: Batter holds well in the fridge for make-ahead prep.
- Restaurant results at home: Consistent structure with a true lava center.
What Not to Do
- Don’t overbake: Even 1–2 extra minutes can turn the center cakey.
- Don’t skip greasing and cocoa: Sticking ruins the release and presentation.
- Don’t use chocolate chips alone: Many contain stabilizers that affect melt and texture. Use quality bar chocolate.
- Don’t mix the batter aggressively after adding flour: Overmixing toughens the crumb.
- Don’t let the chocolate get too hot: Very hot chocolate can scramble the eggs.
Let it cool slightly before combining.
Recipe Variations
- Salted caramel core: Chill small scoops of soft caramel, then push one into the center of each filled ramekin before baking.
- Peanut butter swirl: Add a teaspoon of creamy peanut butter to each cup and gently swirl with a toothpick.
- Orange mocha: Add 1 teaspoon orange zest and 1 teaspoon instant espresso powder to the batter.
- Raspberry center: Drop a spoonful of thick raspberry jam into the middle before baking.
- Gluten-free swap: Replace flour with an equal amount of fine almond flour or a 1:1 gluten-free blend.
FAQ
Can I use a muffin tin instead of ramekins?
Yes. Grease and cocoa-dust a standard muffin tin and fill six wells about three-quarters full. Start checking at 8–9 minutes, since they bake faster.
How do I know they’re done?
The edges will look set and pull slightly from the sides, while the center remains soft and a bit sunken.
A gentle jiggle in the middle is a good sign. If the top is fully firm, it’s overbaked.
What chocolate works best?
Use quality bar chocolate in the 60–70% range. It melts smoothly and gives a deep, balanced flavor.
Avoid low-cacao or overly sweet chocolate, which can taste flat.
Can I make the batter ahead?
Yes. Portion into prepared ramekins, cover, and refrigerate up to 24 hours. Bring closer to room temp before baking, and add a minute or two if the centers seem too raw.
Why did my cakes stick?
They likely needed more butter and cocoa along the sides, or they rested too long.
Thorough greasing and dusting are key. Loosen with a thin knife right after baking and invert promptly.
Can I freeze them?
You can freeze filled, unbaked ramekins for up to one month. Thaw overnight in the fridge, then bake as directed, adding a couple of minutes if cold.
Wrapping Up
Molten Chocolate Lava Cakes feel indulgent, but the method is simple and reliable.
With a few quality ingredients and careful timing, you’ll get that beautiful flow every time. Keep this recipe handy for effortless elegance on any night you want dessert to steal the show.