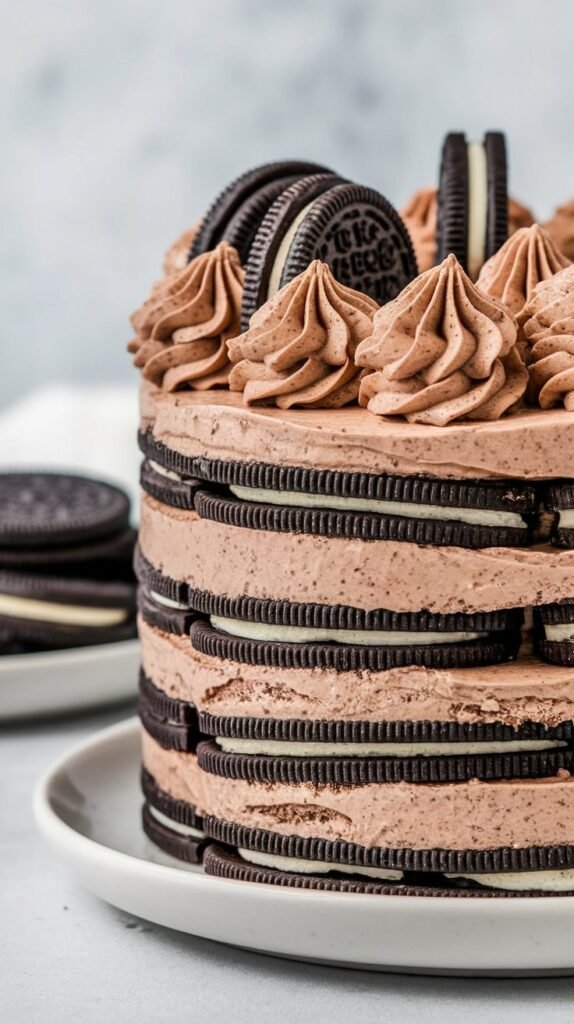
Nutella Oreo Icebox Cake – The No-Bake Dessert That Feels Fancy
Let’s be honest—sometimes you want a fancy, show-stopping dessert without actually putting in fancy, show-stopping effort. That’s where Nutella Oreo Icebox Cake comes in.
This cake is layers of Oreo cookies, Nutella whipped cream, and more Oreos, all stacked together and left to chill in the fridge until it transforms into a soft, creamy, mousse-like masterpiece. And the best part? It takes 10 minutes to assemble and requires zero baking.
Prepare to impress yourself.
Why You Need to Make This ASAP
- No oven, no baking, no stress. Just layer, chill, and eat.
- Tastes like a chocolate mousse cake, but way easier. Oreos soften into pure magic.
- Nutella + whipped cream = the ultimate fluffy, chocolatey goodness.
- Perfect make-ahead dessert. The longer it sits, the better it gets.
- Looks fancy but takes almost no effort. Your secret is safe with me.
What You’ll Need
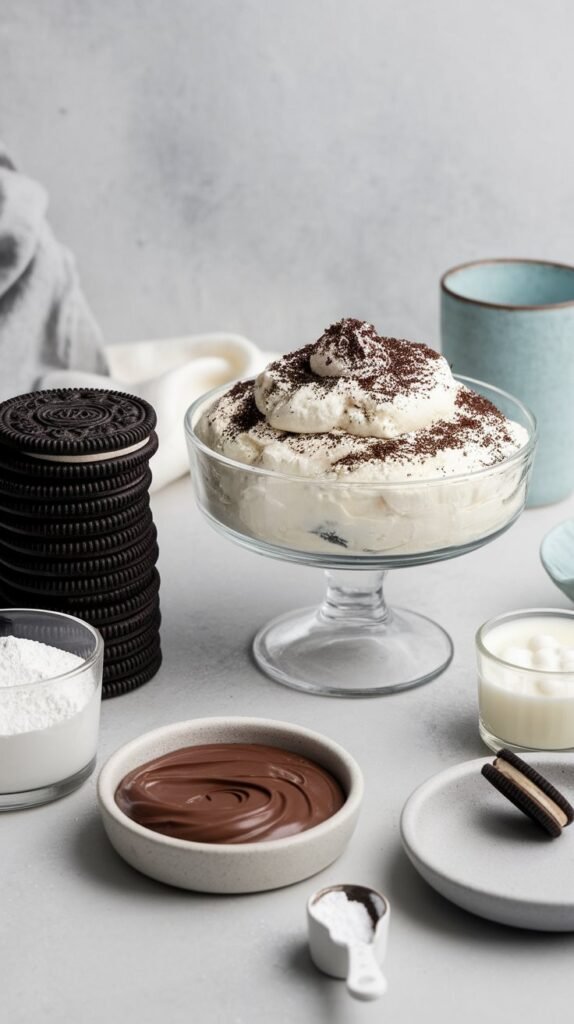
📌 For the Nutella whipped cream:
- 2 cups heavy whipping cream
- ½ cup Nutella
- 2 tbsp powdered sugar
- 1 tsp vanilla extract
📌 For the layers:
- 1½ packs of Oreo cookies (~45 Oreos)
- ½ cup milk (for dipping the Oreos)
📌 For topping (optional, but highly recommended):
- Crushed Oreos
- Drizzle of melted Nutella
- Whipped cream dollops
How to Make Nutella Oreo Icebox Cake
Step 1: Make the Nutella Whipped Cream
- Using a hand mixer or stand mixer, beat heavy whipping cream, Nutella, powdered sugar, and vanilla together until fluffy and thick (stiff peaks form).
Step 2: Start Layering
- Dip each Oreo into milk for 1-2 seconds (just enough to soften slightly, but not make them mushy).
- Arrange a single layer of Oreos at the bottom of an 8×8-inch dish.
- Spread a thick layer of Nutella whipped cream over the Oreos.
Step 3: Repeat Until You Run Out of Ingredients
- Keep layering Oreos and Nutella cream until you reach the top.
- Finish with a layer of whipped cream.
Step 4: Chill & Transform
- Cover and refrigerate for at least 4 hours, preferably overnight.
- The Oreos will soften into a cake-like texture, making every bite pure magic.
Step 5: Decorate & Serve
- Before serving, top with crushed Oreos, a Nutella drizzle, and extra whipped cream.
- Slice, serve, and watch people lose their minds over how good it is.

Ways to Customize Your Icebox Cake
🔥 Want a peanut butter twist? Swap half the Nutella for peanut butter.
🔥 Go white chocolate. Use Golden Oreos and white chocolate spread instead of Nutella.
🔥 Make it boozy. Add a splash of Baileys or Kahlua to the whipped cream.
🔥 Add crunch. Sprinkle chopped hazelnuts or crushed pretzels between layers.
🔥 Turn it into mini desserts. Assemble in small cups or jars for individual servings.
FAQs – Because You Probably Have Questions
1. How long does this cake last?
Keep it in the fridge for up to 4 days. It actually gets better the longer it sits.
2. Can I freeze it?
Yes! Freeze for up to a month, then thaw in the fridge for a few hours before serving.
3. Do I have to dip the Oreos in milk?
It’s highly recommended—it softens them faster and gives that perfect “cake” texture.
4. Can I use store-bought whipped cream?
Yes! But homemade Nutella whipped cream is way fluffier and richer.
5. What’s the best way to slice it?
Use a sharp knife dipped in warm water for clean slices.
6. Can I make this in a bigger dish?
Absolutely! Double the recipe and use a 9×13-inch pan.
Final Thoughts – Your New Go-To No-Bake Dessert
This Nutella Oreo Icebox Cake is chocolatey, creamy, ridiculously easy, and impossible to mess up. Whether it’s for a party, a holiday, or just because you deserve something delicious, this cake delivers every single time.
So grab those Oreos, whip up some Nutella cream, and let your fridge do all the work. You’re going to love this one. 😏