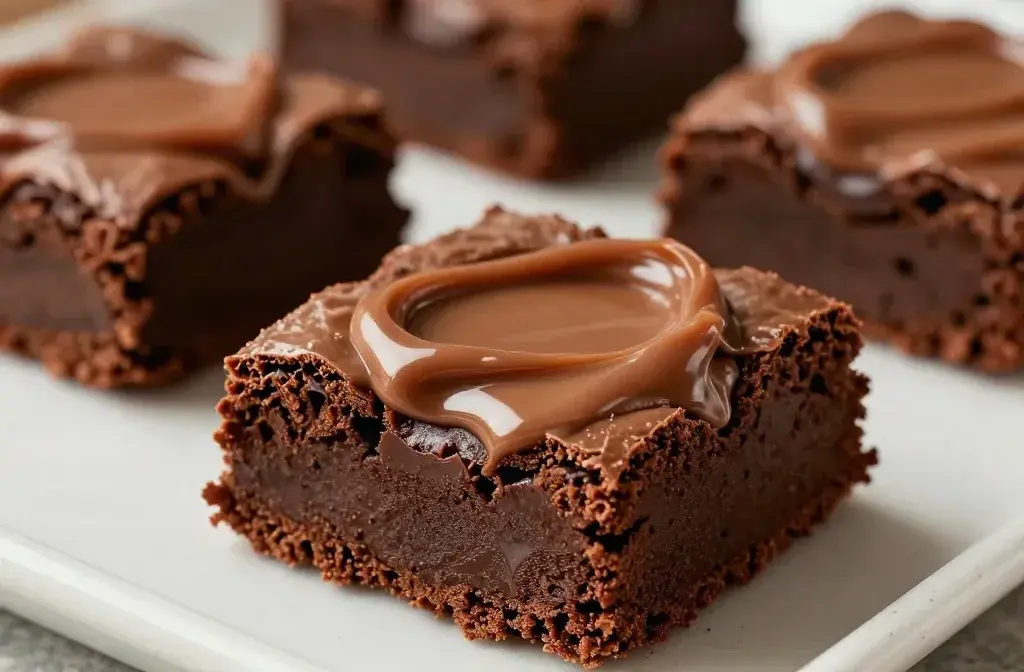
How to Make 3-Ingredient Nutella Brownies
If you’ve got Nutella and a sweet tooth, you’re about five minutes away from brownie destiny. These 3-ingredient Nutella brownies don’t ask for much—just a bowl, a spoon, and a willingness to wait while your kitchen smells like a chocolate-hazelnut daydream. No mixers, no fancy tricks, no weird ingredients. Just fudgy squares of joy that taste like you actually tried. Spoiler: you didn’t. And that’s the beauty.
Why 3-Ingredient Brownies Work (And Taste Ridiculous)
Let’s clear something up: you can absolutely make legit brownies with only three ingredients. Nutella adds fat, sugar, and cocoa in one neat jar. Eggs bind everything together and add richness. Flour gives structure so you get chewy edges and a soft center.
Want to know the magic ratio? 1 cup Nutella + 2 large eggs + 1/2 cup all-purpose flour. That’s the base. It works because Nutella pulls triple duty while eggs provide lift and moisture. Less fuss, more brownie.
Ingredients and Tools You Actually Need
You don’t need a stand mixer or a culinary degree. Just the basics.
Ingredients:
- 1 cup Nutella (about 280 g; slightly heaping cup is fine)
- 2 large eggs, room temp if you can swing it
- 1/2 cup all-purpose flour (60 g), spooned and leveled
Optional but elite add-ins:
- 1/2 tsp vanilla for a cozy vibe
- Pinch of salt (do it—brings out the chocolate)
- Handful of chocolate chips or chopped hazelnuts for crunch
Tools:
- 1 medium bowl + sturdy spoon or spatula
- 8×8-inch pan (lined with parchment)
- Measuring cups/spoons
Step-by-Step: From Jar to Joy
Does this require technique? Barely. If you can stir, you can bake these.
- Preheat your oven to 350°F (175°C). Line an 8×8 pan with parchment and lightly grease.
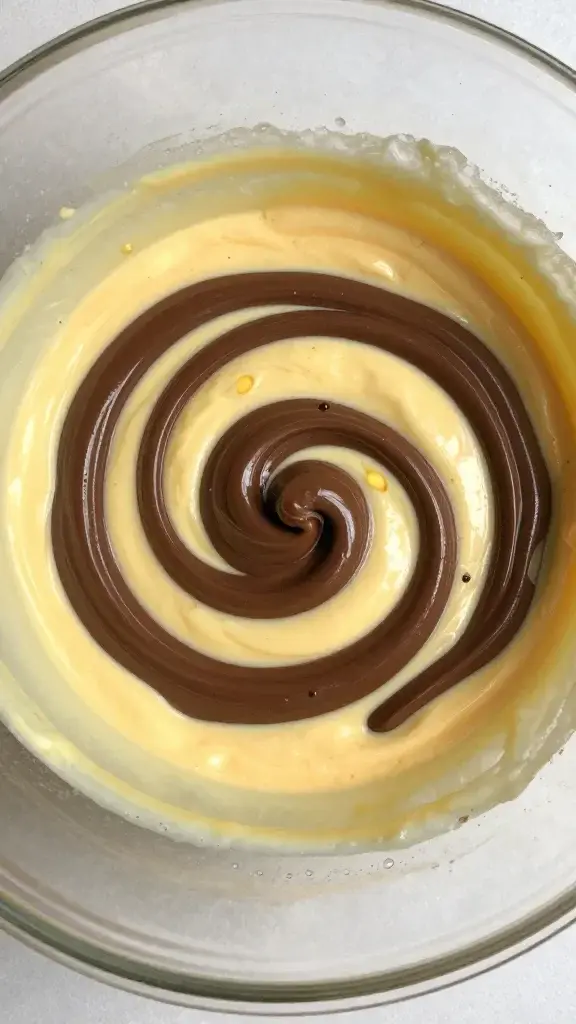
- Mix wet stuff: In a bowl, whisk the eggs until slightly foamy. Stir in the Nutella until smooth and glossy.
- Add dry stuff: Sprinkle in the flour (and salt if using). Fold gently until just combined. Don’t overmix. We want fudgy, not cakey.
- Customize: Fold in chips or nuts if desired. The batter will be thick—normal.
- Spread and bake: Smooth into the pan. Bake 18–22 minutes. Start checking at 18. A toothpick should come out with moist crumbs, not wet batter.
- Cool in the pan for at least 15–20 minutes before slicing. Yes, waiting is hard. Yes, it’s worth it.
Quick Visual Cues
- Shiny top with tiny cracks = great sign
- Edges set, center slightly soft = fudgy success
- Toothpick with a little goo = underbaked; give it 2–3 more minutes
Texture Tweaks: Fudgy vs. Cakey
Not all brownie people are the same. Some want collapse-in-the-middle fudgy. Others want a bit of lift. Pick your adventure.
For Fudgy Brownies
- Bake closer to 18–19 minutes
- Use a heaping cup of Nutella for extra richness
- Add a tablespoon of milk or espresso for deeper flavor and moisture (optional)
For Cakier Brownies
- Bake to 21–22 minutes
- Whisk eggs extra well to incorporate more air
- Add an extra 1–2 tablespoons flour
Flavor Upgrades That Still Keep It Simple
You want to keep the 3-ingredient flex, I get it. But IMO, a pinch here and there can turn great into “please send the recipe.”
- Salt: A small pinch transforms the chocolate. Don’t skip.
- Espresso powder (1 tsp): Deepens chocolate without tasting like coffee. FYI, it’s subtle magic.
- Hazelnut crunch: Chop roasted hazelnuts and sprinkle on top before baking.
- Swirl it: Dollop a spoonful of Nutella on top and swirl with a knife for a marbled look.
- Flaky sea salt: Sprinkle after baking while warm. Fancy vibes with zero effort.
Dietary Swaps (Still Tasty)
- Gluten-free: Swap all-purpose flour with a 1:1 gluten-free blend. Choose one with xanthan gum for best structure.
- Dairy-free: Use a dairy-free chocolate-hazelnut spread. Texture may vary slightly but still works.
Pan Sizes, Portions, and Baking Times

Not everyone owns an 8×8 pan. Here’s your cheat sheet.
- 8×8-inch pan: 18–22 minutes, classic thickness
- 9×9-inch pan: 15–18 minutes, thinner brownies
- Loaf pan: 23–27 minutes, thicker center; watch carefully
- Muffin tin: 10–13 minutes; great for portion control (or fake portion control)
Scaling Up
- Double the recipe for a 9×13-inch pan. Bake 22–26 minutes. Check early; every oven lies a little.
Serving and Storing (AKA: How Not to Finish the Pan in One Night)
You can eat these warm with a spoon and zero shame. But if you want clean edges and a little chew, let them cool.
- Serve: Great plain, with a scoop of vanilla ice cream, or a drizzle of warm Nutella.
- Slice: Use a sharp knife; wipe between cuts. Or use a plastic knife for less sticking. Weird trick, works great.
- Store: Airtight container at room temp for 3–4 days. They stay moist thanks to the Nutella.
- Freeze: Wrap slices individually and freeze up to 3 months. Thaw at room temp or microwave 15–20 seconds.
Troubleshooting
- Dry brownies: Overbaked or too much flour. Spoon and level flour next time, and pull earlier.
- Sunken center: Underbaked a bit. Add 2–3 more minutes; remember, centers should be barely set.
- Greasy top: Batter wasn’t fully mixed. Stir until smooth but don’t go wild.
Make It a Moment: Easy Pairings
Want to make these brownies feel like a whole event? Minimal effort, maximum applause.
- Espresso or strong coffee: Balances the sweetness and makes the chocolate pop.
- Vanilla ice cream: Classic for a reason. Add a dusting of cocoa if you’re feeling cheffy.
- Fresh berries: Strawberries or raspberries add a bright, tart contrast.
- Whipped cream: Light, sweet, and takes 60 seconds if you DIY.
FAQ
Can I make these brownies without eggs?
You can try an egg substitute, but results vary. Flax eggs or commercial egg replacers work, though the texture leans denser and less glossy. If you go that route, bake in a smaller pan and don’t overbake to keep them fudgy.
Is there a way to reduce the sweetness?
A little. Add a pinch more salt, use dark chocolate chips instead of milk, and serve with unsweetened whipped cream. You can’t cut the Nutella without changing texture, but you can balance it with bitter or salty elements.
Do I need to melt the Nutella first?
Nope. If your Nutella feels stiff, warm it in the microwave for 10–15 seconds to make mixing easier. You don’t want it hot—just looser.
Why didn’t my brownies get a shiny top?
Shiny tops come from well-emulsified sugar and fat. Make sure you whisk the eggs well and mix the batter until smooth. Also, don’t dust the top with flour or cocoa before baking; that kills the shine.
Can I add cocoa powder to make it more chocolatey?
You can add 1–2 tablespoons, but you’ll need a splash of milk or oil to keep the batter from drying out. Honestly, espresso powder does more flavor work for less fuss, IMO.
How do I know when they’re done?
Look for set edges and a slightly soft center. A toothpick should come out with moist crumbs—no wet streaks. Err on the side of underbaked; they firm up as they cool.
Conclusion
Three ingredients. One bowl. Twenty minutes to chocolate-hazelnut bliss. These brownies prove you don’t need a shopping list the length of a novel to bake something unforgettable. Keep the basics, tweak the texture, add a flourish if you’re feeling fancy—and then try not to eat half the pan while it cools. FYI, no judgment if you fail that last part.