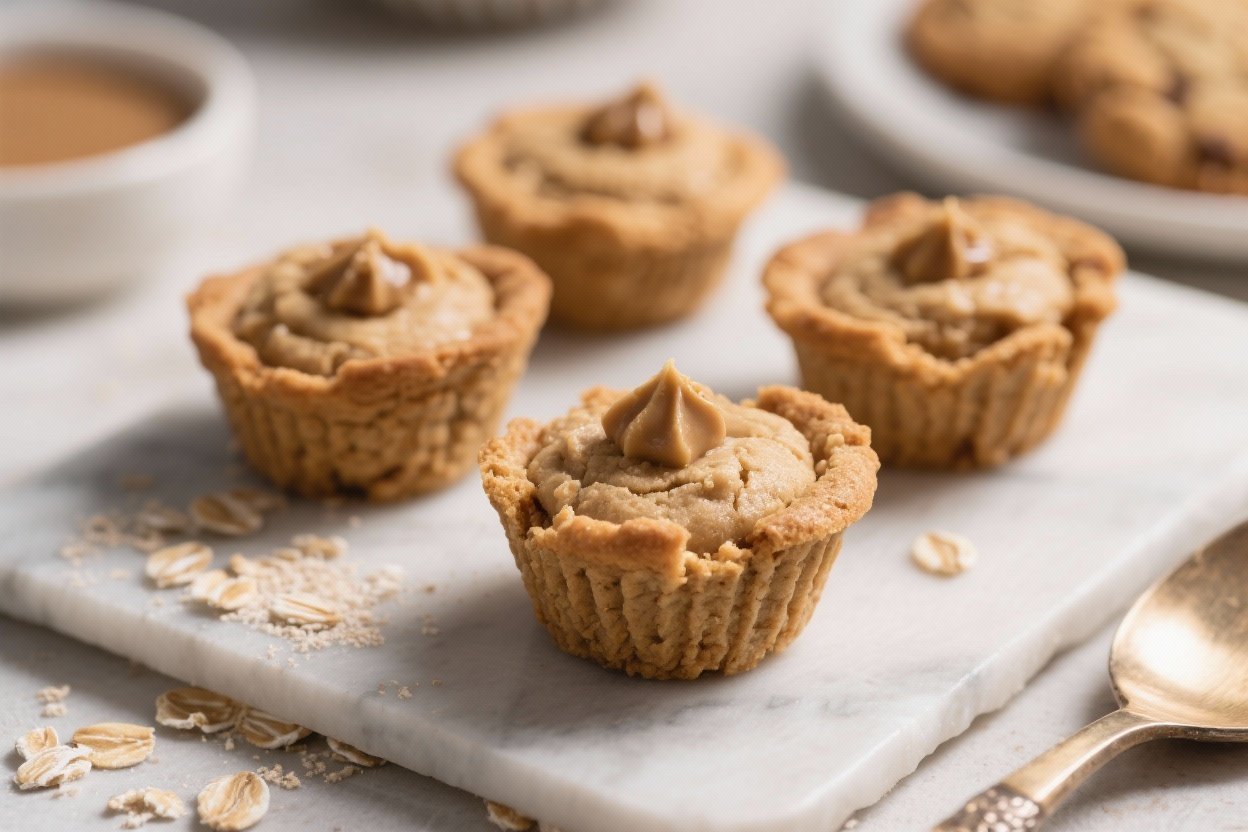
Oat Flour Peanut Butter Cookie Cups – Soft, Chewy, and Naturally Gluten-Free
These cookie cups bring together smooth peanut butter and nutty oat flour in a bite-sized, soft-baked treat. They’re simple to make, gentle on the budget, and easy to love. No fancy tools, no complicated steps—just a muffin pan and a few pantry staples.
Whether you’re baking for a party or a quick weekday dessert, these deliver big flavor with minimal effort.

Oat Flour Peanut Butter Cookie Cups - Soft, Chewy, and Naturally Gluten-Free
Ingredients
- 1 cup creamy peanut butter (natural works; stir well)
- 1/2 cup brown sugar, packed
- 1/4 cup granulated sugar
- 1 large egg, room temperature
- 2 tablespoons milk (dairy or unsweetened non-dairy)
- 1 teaspoon vanilla extract
- 1 1/4 cups oat flour (store-bought or finely ground oats)
- 1/2 teaspoon baking soda
- 1/4 teaspoon baking powder
- 1/4 teaspoon fine sea salt
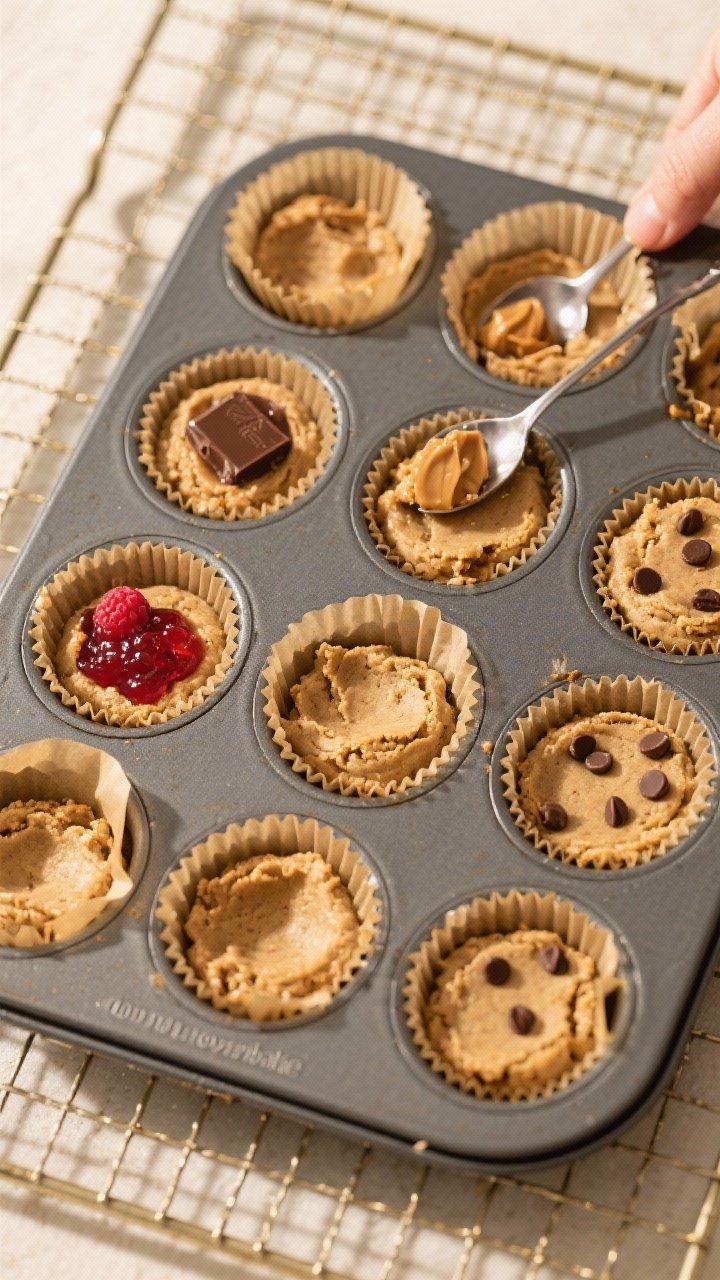
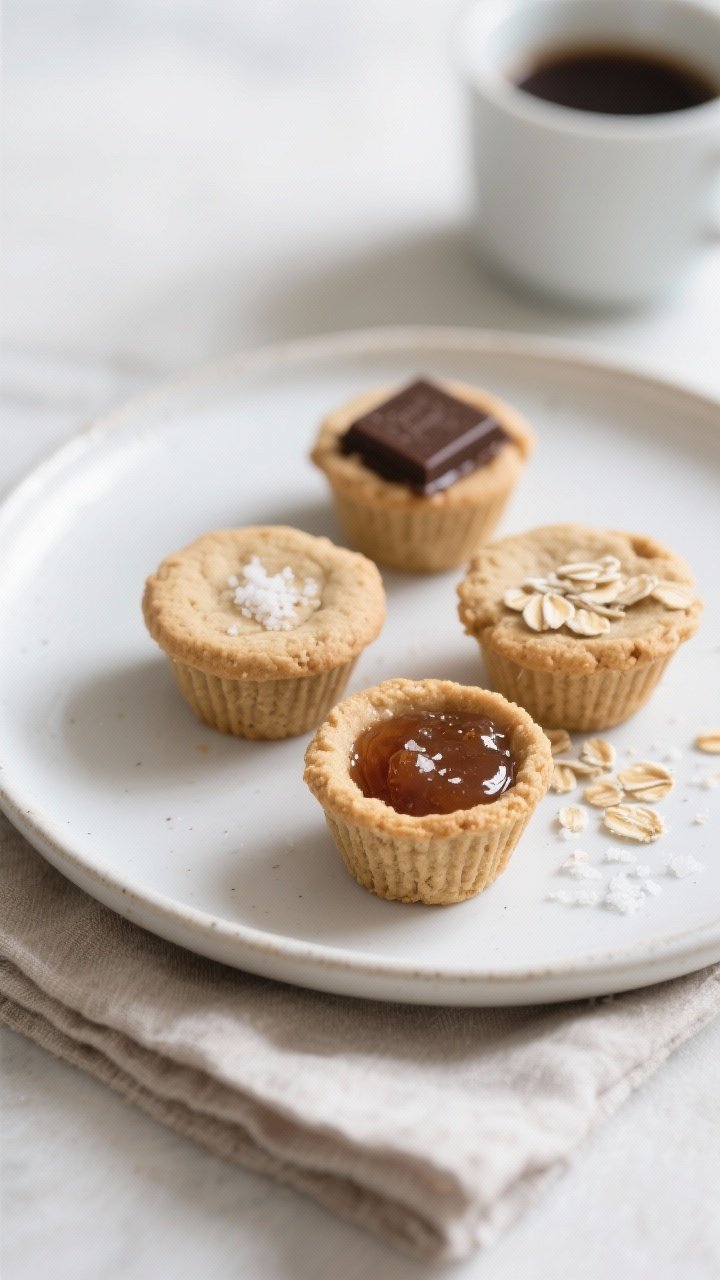
- Optional fillings: mini chocolate peanut butter cups, chocolate chips, jam, or a square of dark chocolate
Instructions
- Prep the pan: Heat oven to 350°F (175°C). Grease a 12-cup muffin tin or line with paper liners.
- Mix the wet ingredients: In a bowl, whisk peanut butter, brown sugar, granulated sugar, egg, milk, and vanilla until smooth and glossy.
- Combine the dry: In a separate bowl, whisk oat flour, baking soda, baking powder, and salt to break up any lumps.
- Bring it together: Add dry ingredients to wet. Stir with a spatula until just combined.The dough will be thick, soft, and slightly sticky.
- Portion: Scoop about 1 1/2 tablespoons of dough into each muffin cup. Lightly press to flatten the tops.
- Create the wells: Use the back of a spoon or your thumb to press a shallow indent in the center of each portion.
- Bake: Bake 9–11 minutes, until the edges are set and the centers look slightly underdone. Do not overbake—they’ll continue to set as they cool.
- Fill and set: Immediately add your filling to the warm centers (press in a chocolate or spoon a little jam). Let the cookie cups cool in the pan 10–15 minutes before transferring to a rack.
What Makes This Recipe So Good

- Gluten-free friendly: Oat flour keeps the texture tender and chewy without wheat flour.
- Perfectly portioned: Baked in a muffin tin, every cup is evenly sized and easy to serve.
- Rich peanut butter flavor: Creamy, nutty, and satisfying without being overly sweet.
- Simple ingredients: Mostly pantry staples you probably already have.
- Customizable: Fill them with chocolate, jam, or leave them plain—your call.
What You’ll Need
- 1 cup creamy peanut butter (natural works; stir well)
- 1/2 cup brown sugar, packed
- 1/4 cup granulated sugar
- 1 large egg, room temperature
- 2 tablespoons milk (dairy or unsweetened non-dairy)
- 1 teaspoon vanilla extract
- 1 1/4 cups oat flour (store-bought or finely ground oats)
- 1/2 teaspoon baking soda
- 1/4 teaspoon baking powder
- 1/4 teaspoon fine sea salt
- Optional fillings: mini chocolate peanut butter cups, chocolate chips, jam, or a square of dark chocolate
Instructions
- Prep the pan: Heat oven to 350°F (175°C). Grease a 12-cup muffin tin or line with paper liners.
- Mix the wet ingredients: In a bowl, whisk peanut butter, brown sugar, granulated sugar, egg, milk, and vanilla until smooth and glossy.
- Combine the dry: In a separate bowl, whisk oat flour, baking soda, baking powder, and salt to break up any lumps.
- Bring it together: Add dry ingredients to wet. Stir with a spatula until just combined.
The dough will be thick, soft, and slightly sticky.
- Portion: Scoop about 1 1/2 tablespoons of dough into each muffin cup. Lightly press to flatten the tops.
- Create the wells: Use the back of a spoon or your thumb to press a shallow indent in the center of each portion.
- Bake: Bake 9–11 minutes, until the edges are set and the centers look slightly underdone. Do not overbake—they’ll continue to set as they cool.
- Fill and set: Immediately add your filling to the warm centers (press in a chocolate or spoon a little jam). Let the cookie cups cool in the pan 10–15 minutes before transferring to a rack.
Keeping It Fresh
- Room temperature: Store in an airtight container for 3–4 days.
Add a small slice of bread in the container to keep them soft.
- Refrigerator: Keeps well for up to 1 week; let them come to room temperature before serving.
- Freezer: Freeze in a single layer, then move to a freezer bag for up to 2 months. Thaw at room temperature or warm briefly in the microwave.
Why This Is Good for You
- Whole-grain boost: Oat flour offers fiber and a gentle, satisfying texture.
- Protein and healthy fats: Peanut butter adds staying power and flavor without needing tons of butter.
- Balanced sweetness: A mix of brown and white sugar creates depth without going overboard.
Pitfalls to Watch Out For
- Overbaking: Oat flour dries out fast. Pull them when the centers still look soft.
- Using oily peanut butter without stirring: If using natural peanut butter, stir thoroughly to avoid greasy, crumbly dough.
- Packing oat flour: Spoon and level the flour; too much makes the cups dense and dry.
- Skipping the cool time: Let them set in the pan, or they may break when you lift them out.
Variations You Can Try
- PB&J cups: Spoon in raspberry or strawberry jam after baking.
- Double chocolate: Mix mini chocolate chips into the dough and top with a square of dark chocolate.
- Salted caramel: Add a teaspoon of caramel sauce to the center and finish with flaky sea salt.
- Almond swirl: Swap peanut butter for almond butter and add a pinch of cinnamon.
- Trail mix: Stir in chopped peanuts, dried cherries, and a few chocolate chips for texture.
FAQ
Can I make my own oat flour?
Yes.
Blend rolled oats in a high-speed blender until very fine. Measure after blending for accuracy.
Are these gluten-free?
They can be. Use certified gluten-free oat flour and check your add-ins to ensure they’re gluten-free.
What if I only have natural peanut butter?
It works.
Stir thoroughly to reincorporate the oil, and if the dough feels oily, add 1–2 tablespoons extra oat flour.
Can I make them dairy-free?
Yes. Use a non-dairy milk and dairy-free chocolate. The rest of the recipe is naturally dairy-free.
How do I prevent sticking?
Grease the muffin tin well or use paper liners.
Let the cups cool before removing so they firm up.
Can I use a mini muffin tin?
Absolutely. Reduce the bake time to about 7–9 minutes and keep an eye on them.
Do I need both baking soda and baking powder?
Yes. The combo helps with lift and keeps the texture soft and tender with oat flour.
Final Thoughts
Oat Flour Peanut Butter Cookie Cups are the kind of treat that feels special without taking all afternoon.
They’re soft, chewy, and easy to customize for any mood or occasion. Keep a batch on hand for lunchboxes, coffee breaks, or a quick dessert that always hits the spot. Once you make them, they’ll become a new go-to.