Mini Cheesecake Bites
You know what’s better than cheesecake? Cheesecake you can eat with your fingers. Meet your new obsession: Mini Cheesecake Bites.
They’re creamy. They’re adorable. They’re portion-controlled (theoretically). And they give big dessert energy without requiring springform pans or water baths or any of that cheesecake drama.
These are perfect for parties, showers, late-night cravings, or just standing in front of your fridge going, “Hmm… I’ll have one more.”
Why They’re Basically the MVP of Desserts

Mini Cheesecake Bites are like the Beyoncé of bite-sized sweets:
- Perfectly portioned – unless you eat six. But we don’t judge.
- Easy to make – no cracks, no fuss.
- Customizable – fruit topping? Chocolate swirl? Cookie crust? Go wild.
- Make-ahead friendly – actually taste better chilled overnight.
Also, they’re cute. And that matters more than we admit.
Ingredients
For the Crust:
- 1 cup graham cracker crumbs
- 3 tablespoons sugar
- 4 tablespoons melted butter
For the Cheesecake:
- 2 (8 oz) blocks cream cheese, softened
- 1/2 cup sugar
- 1 teaspoon vanilla extract
- 2 large eggs
- 1/4 cup sour cream (adds that creamy tang)
- Optional: 1 tablespoon flour (helps stability if you’re clumsy)
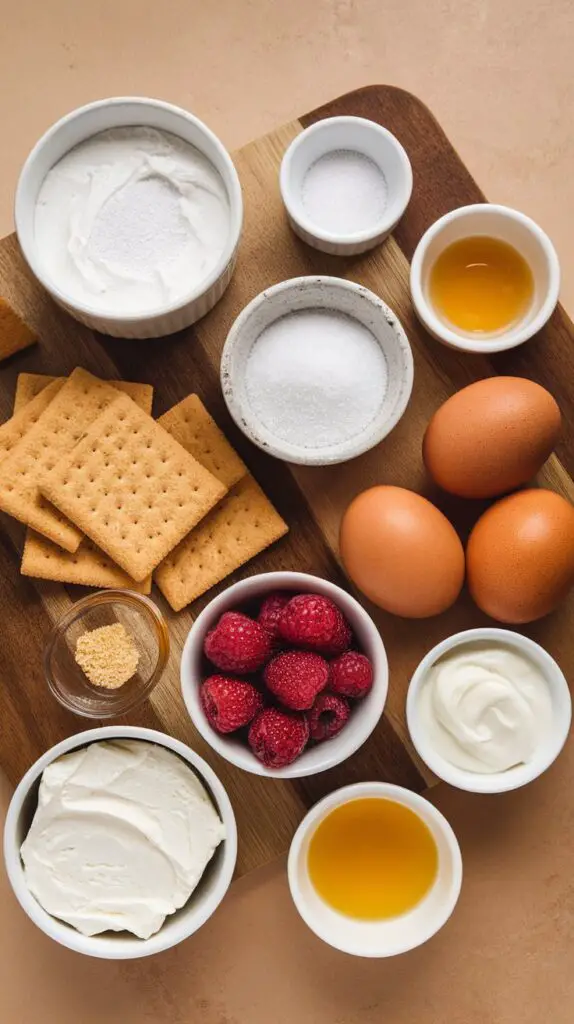
Toppings (optional but encouraged):
- Fruit preserves or fresh berries
- Melted chocolate or caramel drizzle
- Crushed Oreos, nuts, or sprinkles for crunch
You’ll also need: A mini muffin pan + liners. Or a regular muffin pan for bigger “mini” cheesecakes—still counts.
Instructions
Step 1: Preheat & Prep
- Preheat oven to 325°F (163°C).
- Line your mini muffin pan with paper liners. This makes removal (and cleanup) way easier.
Step 2: Make the Crust
- Stir together graham cracker crumbs, sugar, and melted butter.
- Spoon about 1 tablespoon into each liner and press it down firmly (back of a spoon = great tool).
- Bake for 5 minutes to set. Let cool slightly while you prep the filling.
Step 3: Make the Cheesecake
- Beat cream cheese until smooth—no lumps allowed.
- Add sugar, vanilla, and sour cream. Mix again.
- Add eggs one at a time, mixing on low speed. Don’t overbeat—just combine.
- Spoon filling into crusts, about 3/4 full.
Step 4: Bake & Chill
- Bake for 14–16 minutes, or until centers are just set (slightly jiggly is good!).
- Cool in the pan for 10 minutes, then transfer to the fridge for at least 2 hours, ideally overnight.
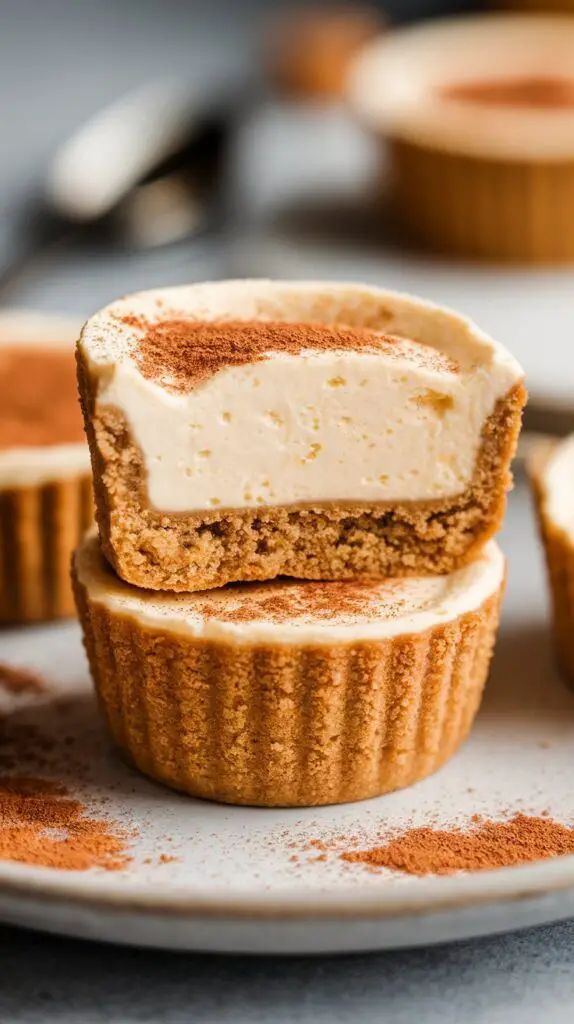
Step 5: Top It Off
Once chilled, add whatever toppings your heart desires—or leave them plain and pretend it’s “classic.”
Common Mistakes (Avoid ’Em!)
1. Overbaking.
Cheesecake should be creamy, not dry. Pull them when the centers still jiggle slightly.
2. Skipping the chill.
I get it—you want to eat them now. But chill time is where the texture sets up and magic happens. Be strong.
3. Lumpy batter.
Everything must be room temp before mixing. Cold cream cheese = chunky regret.
4. No liners.
You can go liner-less and spray the pan… but you’re risking stick-age. Be kind to future you.
Variations for Maximum Fun
These little guys are your canvas. Get creative:
- Chocolate swirl: Drop a little melted chocolate or Nutella on top and swirl with a toothpick before baking.
- Fruit toppings: Spoon on raspberry jam or fresh blueberry compote post-chill.
- Oreo crust: Sub graham crackers for crushed Oreos. You’re welcome.
- Lemon cheesecake bites: Add 1–2 tablespoons of lemon juice + zest to the filling.
- Pumpkin spice: Replace sour cream with canned pumpkin and throw in some cinnamon/nutmeg.
FAQ
Can I freeze these?
Yes! Wrap tightly and freeze for up to 2 months. Thaw in the fridge overnight before serving. They hold up like champs.
Can I use a regular muffin pan?
Absolutely. Just increase the bake time to 18–20 minutes and enjoy the deluxe mini version.
Can I make these no-bake?
You can—but that’s a different recipe involving gelatin or whipped cream. Still tasty, but more mousse than cheesecake.
Can I make these gluten-free?
Yep! Just use gluten-free graham crackers or cookie crumbs for the crust.
Do they need to be refrigerated?
Yes. They’re cream cheese–based, so fridge is mandatory unless you enjoy food poisoning. 😬
Final Thoughts
Mini Cheesecake Bites are tiny, creamy, ridiculously satisfying treats that somehow hit the perfect dessert note every time. They’re easy enough for beginners, cute enough for parties, and indulgent enough to feel like you treated yourself—even if you’re eating them in pajama pants at 10 p.m.
Bake ‘em, chill ‘em, top ‘em, and devour. You’re officially in cheesecake heaven, no springform pan required. 🙌